
Back to school around here always brings up moans and groans
about going back to uniforms every day. I used new outfits for "casual day" to
gen up excitement about school, but it was met
with lukewarm reception so I threw in some new backpacks and hoodies to try and
sweeten the deal a little. I was already
starting to dread back to school when Deb Zaleski announced the dates of the Lulu and Celeste, Sprouting Jube Jube
Productionsback to school tour. Even the kids were excited to jump on board
this year! I made several items for the
tour since I was already thinking about school clothes and how to get the kids
motivated. I’m going to break them up
into sections to keep myself from rambling aimlessly through my own “purple
crayon world”. I do want to apologize in
advance, this post is going to be long. :/!
Sorry, but I got so excited that I sewed up a whole bunch of stuff!
Star Student
Backpack
Every year for the past three years now, the kids get to
trade in their old backpacks for new ones.
Every year, without fail, they pick a theme that I am NOT going to find in
the stores so I make their backpacks and lunch sacks. This year, my son wanted something with astronomy while my daughter (who is obsessed with Dino Dan) asked for dinosaurs. I went with the Star Student Backpack from
PeekABoo Pattern Shop. This backpack is the perfect size for my 2nd and
3rd graders. There’s a main
bag area with a smaller zippered pocket on the outside. I also chose to do the mesh water bottle
holder since they are now allowed to have water bottles in class (this was a
big deal because only the “big kids” get to have those in class).

I will admit that it would have been cheaper to run to the store
to get them the standard store bought packs, but these bags have lasted the
kids through the entire school year every time so I figured the
intial cost up front is well worth not having to replace them midyear. I did use regular quilting cotton for the entire bag so I used interfacing to strengthen the pieces that called for a heavier weight fabric.

The pattern includes very clear instructions and photos with
every step (which I like because I’m more of a visual person). I would definitely recommend some experience
with sewing before taking on this project because of the zippers and all of the
little pieces that need to be placed on the pack during construction.
Waste Free Lunch
Bag*
We scoured patterns for a lunch bag that both of them agreed
on, and we landed on the Waste Free Lunch Bag from Ginger Cake Patterns. The original pattern calls for a flap that
you close with Velcro, but both kids asked for zippers so that nobody could
sneak in and steal their food. Is that even a thing?!? I think there's actually a tutorial that shows you how to make this a zipper closure.

Construction was essentially the same for the bags except that I sewed a zipper in between the main and lining layers to accommodate their request...again, if I would have looked there is already a tutorial on the Ginger Cake blog for how to do this. They really love the divider on the inside of the bag, and I used PUL for the inside to prevent leakage if something busted. We’ve already had a couple of mandarin orange or apple sauce blow outs that were so easy to clean up when they got home.
The instructions on these were so easy to follow along (with
photos if you’re like me), but I do recommend you label the pieces as you cut
them so that you don’t end up wondering what this little square thingie is (ask me how I know that might happen :/)! Virginia also includes a cutting layout
diagram that shows exactly what pieces you should have once all of the
cutting is done. Again, really appreciate
the visual because I need those when I’m sewing.

My son even makes his own lunches because, well, that’s HIS
lunch bag so he wants to fill it.
Score!! He also really likes that nobody has one like it so he can always find his lunch on the shelf.
Knight hoodie
The kids’ school is pretty strict on what color
hoodies/jackets they can wear while they are in class. This makes it a little difficult for us because
the classrooms get cold enough to hang meat in them, and we can't just pack any old sweatshirt. This year, they decided that they want to do
something different from the standard hoodies that you can buy from the school
so I went with the Knight Hoodie from Charming Doodle. The pattern calls for sweatshirt knit, but we were kind of
limited on what we could find around here so I got some fleece from JoAnn’s and
tried that. Perfect!! I didn’t size up on either size, and they
still fit perfectly.

This pattern has a very large size range starting at 2T and
going to a size 10. This gives us a
little bit of mileage, and when they outgrow those, Elisa designed an adult
version of the hoodie! I think I’m going
to buy that one and make myself one with sparkles! HA!
Again, a great pattern.
It’s so well written, and as daunting as I thought it would be to take
on this project, it came together like a dream.
It looks as if it would be terribly complicated but it really isn’t. I was so excited by how quickly and easily it
came together.

I decided that doing the accessorizing parts in fleece would
be too bulky so we used regular quilting cotton for those. The buttons are decorative on this so my
daughter chose some fairy style buttons while my son decided that he wanted
shields on his because that was more “manly”, and he’s a big man now.

If you decide to take on this hoodie, you’ll definitely want
to pay attention to lining up the two sides to make sure they are even when the
hoodie is zipped up. I was a little bit
off on my son’s, but he didn’t even notice so I pretended it never
happened. A few of his classmates told him that they are
going to ask their parents for a knight hoodie for Christmas, and he was so mad
that they might have the same one that he told them the stores don’t make them
anymore. That kid makes me laugh with the stuff he
comes up with.
Domi Sweatpants*
Right now, my son is all about sweatpants and knit wear so I
chose the Domi Sweatpants from Sofilantjes for his pants. My version of the pattern was in English, but you also have the option of getting the pattern in French. My son is pretty short statured for his age so we
made a size 5 length and a size 6 waist for him, and they fit him
perfectly. He’s a collector so he also
loved the pockets. I loved
the contrast of the pocket to the pants.

I did the round pocket for him, and it’s a little shallow so
that might be something to remember if your little likes to stuff a lot of
things in their pockets. He was a little
put out that he wouldn’t be able to put a frog in them, but this momma was
pretty happy about that revelation.
You’ll get a large size range on these pants, starting at 12
months and topping out at a 14. To be
honest, that means my son will be able to have Domi Pants through his entire
school career if he continues the trend of being a little shorter for his age,
and I appreciate that greatly because he wears these every chance he gets.

The pattern also includes three lengths: Bermuda shorts, ¾ length,
and long length. My daughter loves capri anything so these will be perfect for when she needs some quick
sweats in a little shorter length. The
circle pocket version was so quick and easy to make, and I was able to knock
them out from cutting to construction in about 45 minutes.

I didn’t put a drawstring on the ones I made my boy because he
would end up pulling them off somehow, but you do have that option on the front of the waist.
The tutorial includes both illustrations and photos, and the directions
are very clear and easy to understand.
Marc Shirt*
I chose the Marc Shirt from Filles A Maman (this pattern is also available in French), and it’s rated
as an intermediate pattern. I absolutely
agree with that because the shirt is a mixture of cotton woven and knit with a
placket at the shoulder. This pattern,
like the Domi, starts at 12 months and tops out at 14, so we’re pretty happy
that this shirt will carry some mileage with it as well. My son chose his own fabrics and beelined it
for a pretty colorful knit that I got from Sincerely Rylee. It was a relatively lightweight knit, and turned out perfect for this top.

You also have a choice of long or short sleeve on this
pattern. The pieces are layered so you
only have to print the ones that you need if you are wanting to cut down on ink
usage. I would definitely read through
the instructions at least once before starting to make sure you understand
everything.

I would also definitely recommend not skipping the
interfacing on this one. I will admit
that there have been times when I’ve been lazy or impatient and skipped them on
some things, but save yourself some stress and definitely take the time for
this shirt. I feel like it gives the
shirt some added structure and support because you are using two different
fabric types that tend to act very different when you’re sewing them up.
Beatrice Dress
My daughter is so iffy about clothes so I was really
surprised when she chose dresses for her back to school outfits. The first one we picked was the Beatrice Dress from
Handmaiden’s Cottage. I love, love, love
the neckline on this dress. Actually, I
love the bow in the back and the princess seams as well so really, I love this
dress all around. I let her pick the
fabrics she wanted, and I have to admit, she did an amazing job matching
fabrics.

I made a straight sz 8 for her, and it fit like a
glove. The pattern starts at 2T and goes
through size 12 so we have a chance to make a few more of these. There’s also a bloomer pattern if you want to
make something to go under the dress, but we didn’t make those for my daughter.

You have the option of sort puff sleeves or long sleeves,
and we did the short sleeve version. I
kind of celebrated a little inside because I love the puff sleeves. I worked myself up into a worry about doing
them because of the gathering (I am terrible at getting my gathers even), but
man oh man, it was so easy to do!
The pattern came as a ZIP file, and you can either open the
file with all of the pieces on it or you can use the individual size files to
only have the one that you need. As
with all of the patterns so far, the instructions were so clear and concise and
made it so easy when it came to construction.
Plus, photos! Still one of my
favorite parts about PDF tutorials! The Beatrice is also currently 40% off at the Handmaiden's Cottage website and Etsy shop! (Just sayin'...)

This dress did take me a while to finish, but it was so
worth it when it was done because it’s beautiful! AND, buttons in the back! I don’t mind zippers, but I really do love
when the pattern has buttons because I’m uber lazy. My daughter loved the twirl factor on this
dress. She said she felt like she was in
a fairy tale because she could twirl her fancy dress. For a kid who likes to skip rocks and climb
trees, the fact that she wanted a dress was pretty huge. And she’s already worn it several times so
#winning!
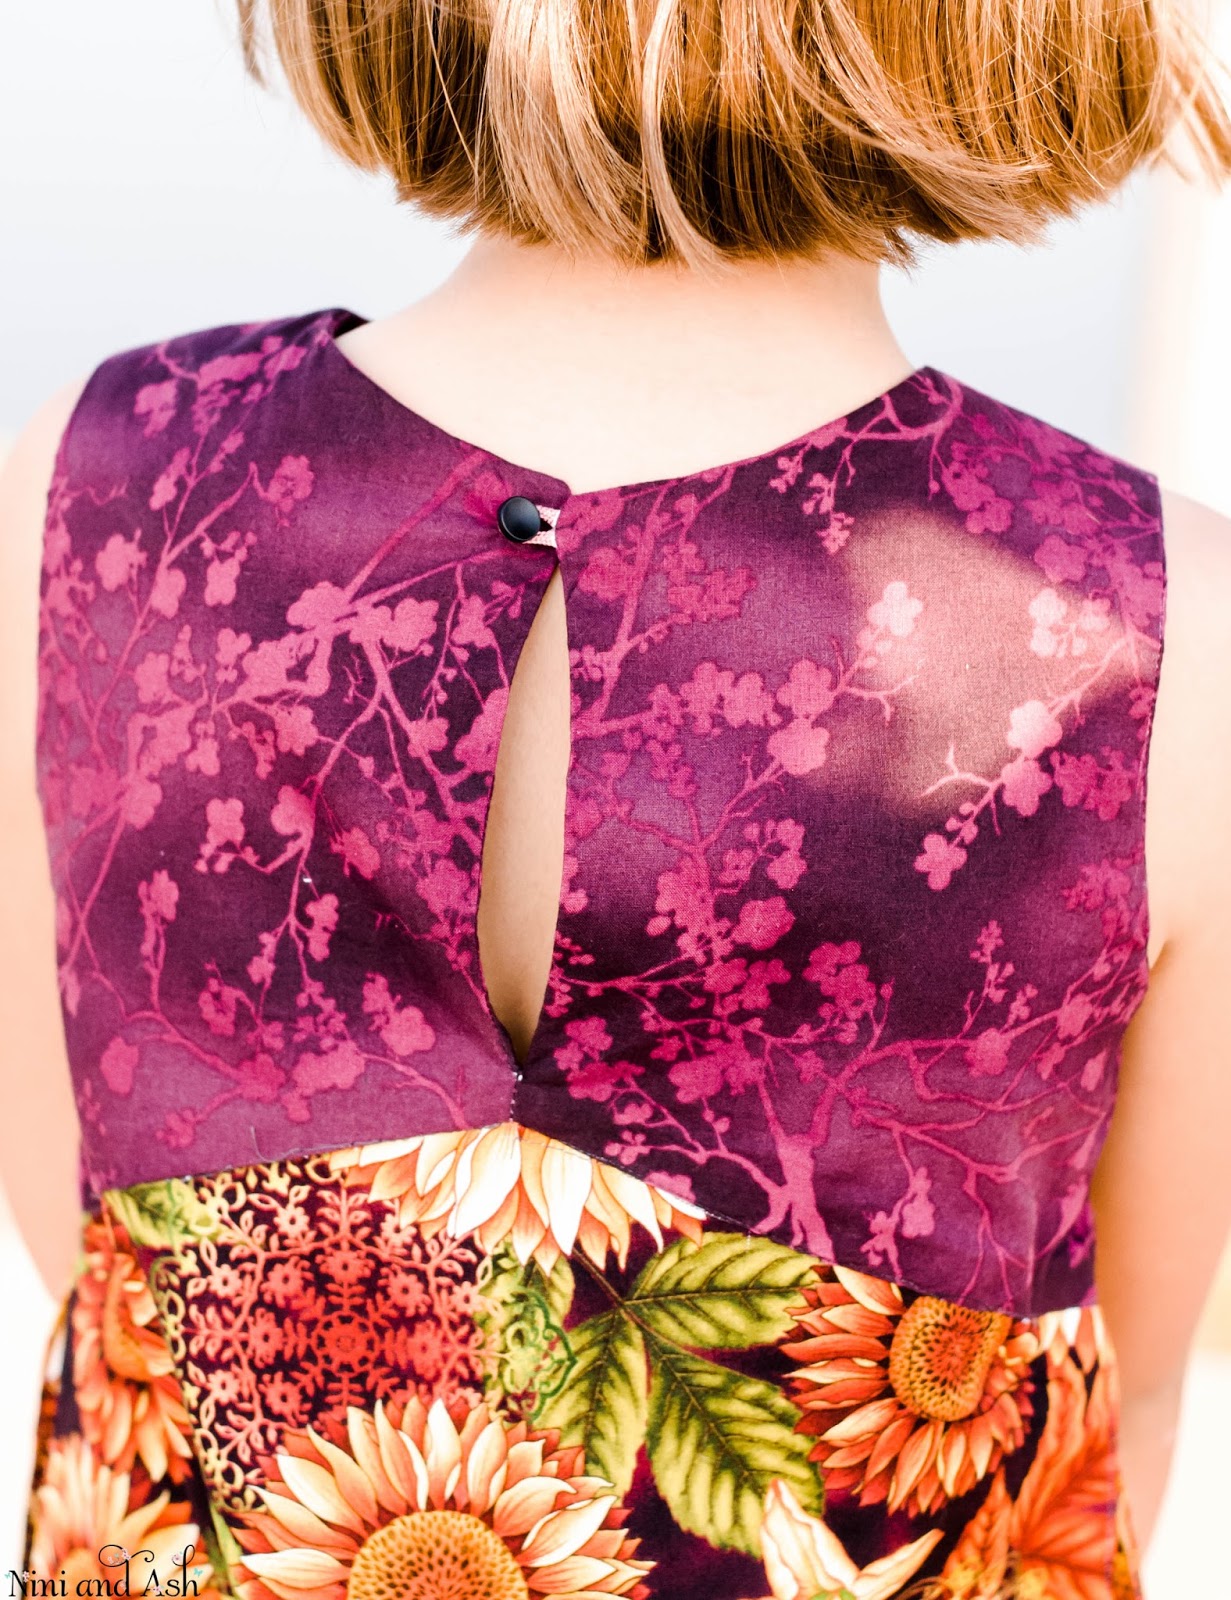
Duchess Dress*
I somehow ended up signing up twice for the tour, and that
meant the bonus of the Duchess Dress from JillyAtlanta! I have loved this dress forever, and this was
absolutely a momma pick when the tour came up.
I was actually biting my fingernails just a little that she wouldn’t
wear this, but she loved it. We used
sunflowers for this one, and she was all about her special fall dress. She told me that it was perfect because she
has a fall dress to go with her winter dress (I’m guessing she dubbed the
Beatrice her winter dress?).

This dress has the classic A-line silhouette that never goes
out of style. I didn’t add bows to the sides
like the pattern calls for but I did add a removable ribbon bow to the front in
a completely different color than anything on the dress, and I really liked the
contrast once it was done! There are
some little side pleats that add a little extra sophistication to the overall
dress.

I was so taken with the unique bodice and really loved how
it came up to a point at the front and back.
My girl is at that age where she doesn’t want anything that makes her
look too young, but she’s not quite ready for too grown up so this dress fit
the bill like it was specifically designed for her.
Like the other patterns, this one has a very large size
range of 2T to 12. It is also a button
closure with one sweet little button at the top of the neck. When putting the bodice together, definitely
take your time because you want to make sure that you get the points really
sharp on the front and back. Jill does a
phenomenal job at walking us through what we need to do to make sure that we
get that part right, and she has photos of every step so we can see what she’s
wanting us to do.
My daughter was so excited that she can still run along the
lake and skip rocks with her brother. I
guess you can put her in a dress, but you can make her stop being a little bit
tomboy. I’m actually okay with that, to
be honest.

I really had a blast sewing up things for this
tour! The kids are enjoying their new
duds and cannot wait to wear them to school, and I had the chance to work with
Lulu and Celeste, Sprouting Jube Jube Productions again! We’ll be having stops along the tour all
week, and we’d love for you to stop by and let us all know what you think of
our back to school creations! If you’re
wanting to see who’s on deck for the rest of the week, take a quick look at the
schedule. Stop on by and show all of the
designers some love!
Monday, September 25, 2017
Host: Sprouting JubeJube
Sewing by Ti * mahlicadesigns * Momma You Can Make It * Kutti Couture * MoonStar - Wondermirakel * Call Ajaire
Tuesday, September 26, 2017
Host: Lulu & Celeste
Sew and Tell Project * From-a-Box * Ronda B. Handmade * MeMade * House of Estrela * My Heart Will Sew On * Tales From A Southern Mom
Wednesday, September 27, 2017
Host: Sprouting JubeJube
mahlicadesigns * Gracious Threads * Adventures With Bubba and Bug * Elli & Nels * Bellevi * Little Heart Threads * Sewing By Ti * Lulu & Celeste
Thursday, September 28, 2017
Host: Lulu & Celeste
Paisley Roots * The Crafting Fiend * Sewstarly * It's Liesel * Tales of a Tester * Kaleidothought * auschick sews
Friday, September 29, 2017
Host: Sprouting JubeJube
SewSophieLynn * Sew Haute Blog * mahlicadesigns * Sew and Tell Project * RP Custom Fabrics Blog * FABulous Home Sewn * Sewing By Ti * Phat Quarters
Also, I do want to say thank you so much to the lovely pattern designers who donated patterns and sponsored this tour so that we could share
some of our back to school outfits with all of you! I do want to post a disclaimer here
that the patterns marked with a * were provided to me free of charge, but the
opinions expressed in this blog are completely my own. This was such a fun tour to sew for, and I’m so
excited to see what you think of everyone’s creations!
Thanks so much for reading along! Now go grab
yourself some patterns, stop by some of the other stops, and show us your
creations if you decide to sew up some happiness of your own!
Blessings and Happy Sewing,
Kim
Oh my goodness your kids are so lucky to have all these wonderful hand made things. I hope they are doing well back in school.
ReplyDeleteYou have gone above and beyond with sewing for this tour! Really amazing sews.
ReplyDeleteEverything you made is sooo good! I love those bags :)
ReplyDelete